So, you’re ready to get your app on the App Store. The journey from code to customer involves a few key milestones: enrolling in the Apple Developer Program, crafting a compelling app listing, and uploading your final build through Xcode. After you hit submit, your app enters Apple’s review queue before it gets the green light.
Laying the Groundwork for a Smooth App Launch
Before you can even dream of launch day, you have to get your foot in the door. That means enrolling in the Apple Developer Program. Think of it as your all-access pass to Apple’s entire ecosystem—it’s the one step you absolutely can’t skip.
Yes, there’s an annual fee, but it’s a necessary cost of doing business. Joining the program will set you back $99 per year, and it’s the price of admission for playing in Apple’s walled garden. It’s a small investment for the potential reach.
Just to give you some perspective, in 2024 alone, developers submitted over 450,000 new apps. But here’s the kicker: only about 60% made it through on the first try. That statistic, courtesy of sqmagazine.co.uk, really drives home how seriously Apple takes its review process. Getting the foundation right is everything.
Your journey starts right here, on the Apple Developer Program homepage.
This is the official starting line. As you can see, Apple lays out the benefits clearly and points you straight to the “Enroll” button.
Before you jump in, it’s a good idea to have your ducks in a row. The table below breaks down what you’ll need depending on how you’re enrolling.
Apple Developer Program Enrollment Essentials
| Requirement | Individual Details | Organization Details |
|---|---|---|
| Account Type | For solo developers or hobbyists. | For registered legal entities (LLC, Corp, etc.). |
| Seller Name | Your legal name is listed on the App Store. | Your company’s legal name is listed as the seller. |
| Verification | Simple. Requires your personal information. | More involved. Requires a D-U-N-S Number and legal entity verification. |
| Cost | $99 per year. | $99 per year. |
| Best For | Freelancers, one-person shops, and personal projects. | Startups, agencies, and established businesses. |
Choosing the right account type from the get-go saves you from administrative headaches later on. If you’re a registered business, go with the Organization account to maintain a professional brand presence.
Getting Your Core Credentials in Order
Once you’re officially in the program, it’s time to generate the credentials that act as your app’s digital passport. This is where things can get a little technical, but it’s a crucial part of securing your app and proving to Apple that you are who you say you are.
My Two Cents: Don’t skim through this part. Certificates, Identifiers, and Profiles are the holy trinity of Apple’s code signing. Nail this setup, and you’ll sidestep a world of frustrating build errors down the road.
You’ll create all of these right from your developer account dashboard.
- Certificates: These are the cryptographic keys that verify your identity. You’ll need a Development Certificate to install and run your app on your personal devices and a Distribution Certificate to submit it to the App Store.
- Identifiers (App IDs): This is a unique string that acts like a license plate for your app. It’s essential for enabling powerful features like push notifications, in-app purchases, or Sign in with Apple.
- Provisioning Profiles: These are the glue that holds everything together. A profile bundles your certificates and App ID, telling specific devices that they’re authorized to run your app. You’ll use a Development Profile for testing and a Distribution Profile for the final App Store build.
Getting these pieces configured correctly is a fundamental skill for any iOS developer. While the context is different, many of the strategic principles are the same when you learn how to successfully launch your app on a platform like the Shopify App Store.
And remember, before you go public, thorough testing is your best friend. A solid beta phase can be the difference between a smooth launch and a buggy mess. If you want to make sure your app is truly ready for primetime, you might find our guide on beta testing best practices really helpful.
Creating Your App Store Product Page
Think of your App Store product page as your app’s digital storefront. This is your one shot to grab a potential user’s attention and convince them your app is worth that tap on the “Get” button. This isn’t just a technical listing; it’s about selling an experience.
Everything from your app’s name to the very last screenshot needs to work together to tell a compelling story. A polished, thoughtful product page builds trust, clearly communicates what your app does, and is one of the biggest factors in driving downloads.
This App Store Connect dashboard is where you’ll pull all of your creative assets and text together. Getting comfortable here is a huge part of learning how to get your app published and in front of users.
Nailing the First Impression with Your Name and Subtitle
Your app’s name and subtitle are incredibly valuable real estate. They show up directly in search results and are the very first words people read. The name needs to be memorable and, if possible, give a hint about what the app actually does.
The subtitle, a tight 30-character field, is your opportunity for a punchy one-liner that drives home your app’s core purpose. For instance, an app named “MarsEdit” is simple and brandable. Its subtitle, “Blog Editor for the Mac,” instantly clarifies its function. It’s a perfect combo—unique yet descriptive.
Crafting a Compelling App Description
Your description is where you can really start a conversation with your potential users. Those first few lines are absolutely critical, as they’re all anyone sees before they have to tap “more.” Use that space to hook them immediately with your app’s biggest benefit.
- Lead with the “Why”: Don’t just list features. Start with the problem your app solves. Instead of saying, “Our app has feature X,” frame it as, “Finally achieve Y with our powerful feature X.”
- Make it Scannable: Let’s be honest, people don’t read walls of text. Use bullet points or short, numbered lists to highlight the best parts of your app. This makes your key selling points easy to digest at a glance.
- Tell a Quick Story: Walk the user through a scenario. If you built a fitness app, paint a picture of how it takes someone from their very first workout to crushing a personal record.
A great app description does more than just list features; it sells a solution. It needs to speak directly to what the user is looking for and show them exactly how your app will make their life better, even in a small way.
Visual Storytelling with Screenshots and Previews
We’re visual creatures, and your screenshots and app preview video are often the final push that leads to a download. These can’t just be random screen captures; they need to be treated like polished marketing assets.
Your app preview, a short video of up to 30 seconds, is your best tool for showing off smooth animations, cool interactions, and the overall feel of your app. It’s one thing to describe an experience, but showing it is so much more powerful. For some solid advice on this, check out these tips on how to make compelling product demo videos.
When it comes to screenshots, stick to these proven practices:
- Showcase Core Features: Each screenshot should highlight a single, important piece of functionality.
- Add Explanatory Text: Overlay short, punchy text on your screenshots to give context and call out the benefit.
- Create a Visual Narrative: Arrange your screenshots in a logical order. Guide the user on a mini-journey, from the welcome screen to that key “aha!” moment.
Optimizing for Discovery with Keywords
Keywords are the engine of App Store Optimization (ASO). Apple gives you a dedicated 100-character keyword field, and you need to make every character count. This is where you list all the relevant terms someone might search for to find an app like yours.
Don’t waste space by repeating words from your app name or subtitle here—use this field for everything else. Put yourself in your user’s shoes. What words would they type into the search bar? To maximize the space, just use single words separated by commas, with no spaces in between.
Handling Privacy Policy Requirements
Last but definitely not least, every app needs a privacy policy. Apple is incredibly serious about user privacy, and you have to be crystal clear about what data your app collects and how it’s used. This isn’t just a legal hoop to jump through; it’s fundamental to building trust with your users.
You’ll need to host this policy on a public website and provide the URL in your App Store Connect listing. Be transparent and write it in plain English. For a full breakdown, our guide covers everything you need to know about crafting a compliant privacy policy for mobile apps. This is a non-negotiable step before you can hit publish.
You’ve nailed down your App Store product page, and all your marketing assets are looking sharp. Now, it’s time to shift gears from marketing back to the code. This is where we take your project from a folder on your Mac and turn it into a real, submittable package for the App Store.
For this part of the journey, Xcode is your mission control. We’ll be configuring the final build, getting the version numbers right, and navigating the sometimes tricky waters of code signing. Getting these details right is the key to a smooth handoff to Apple’s servers.
This handy visual lays out the asset preparation flow that happens before you even get to this stage.
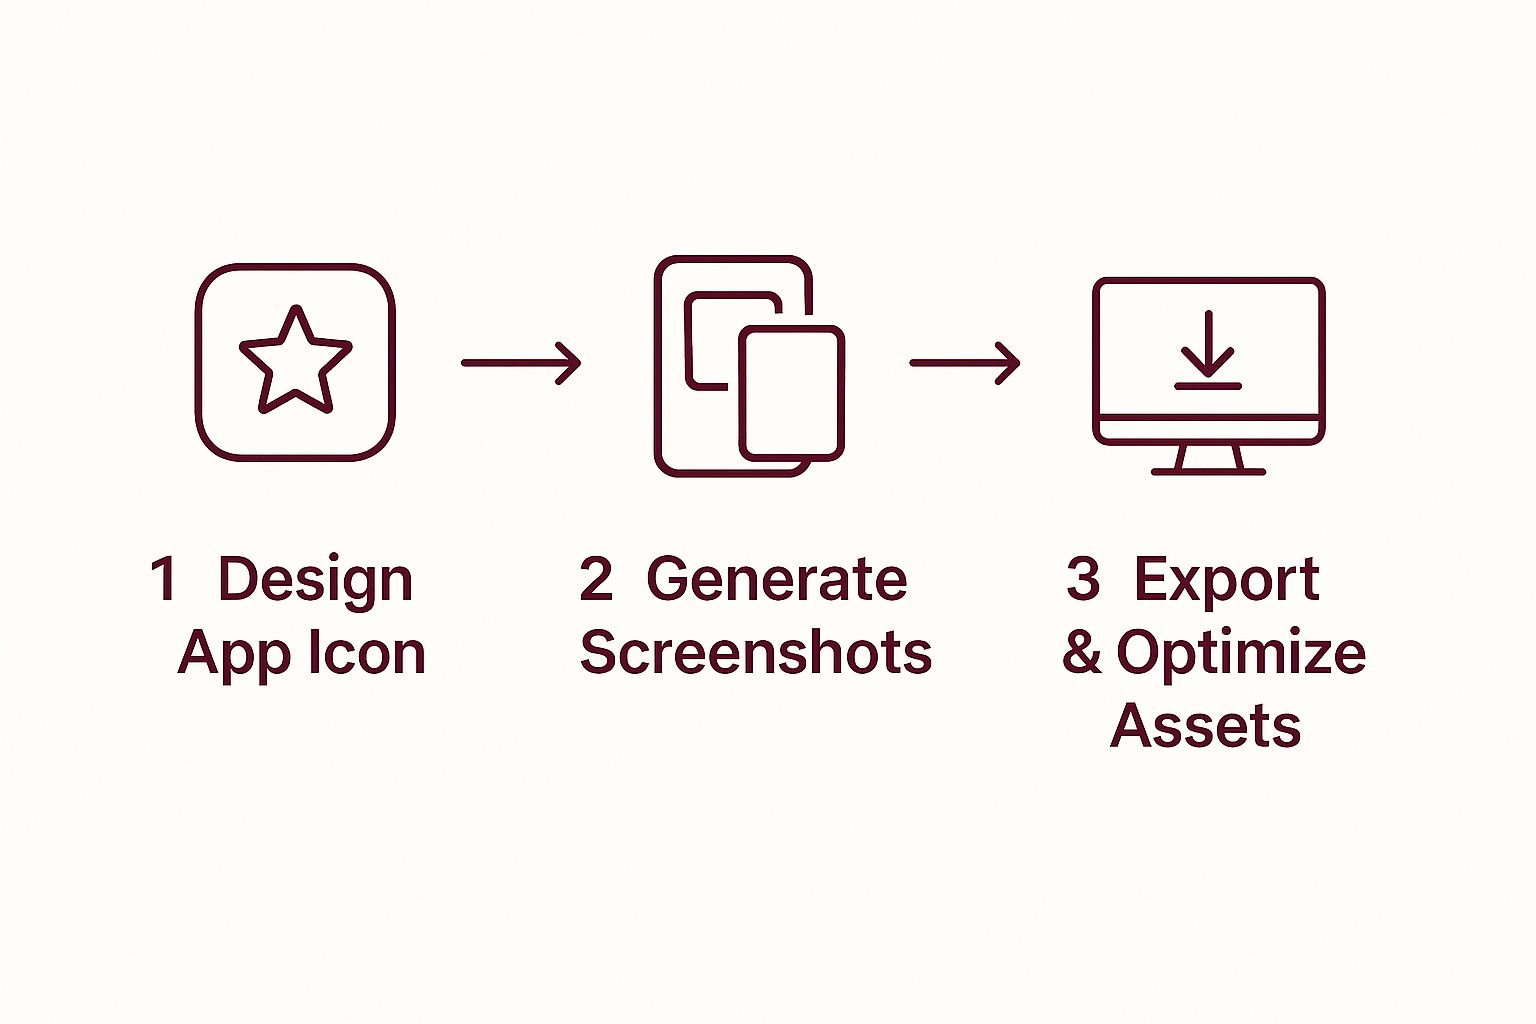
As you can see, having a structured plan for your assets, from icon design to final optimization, saves you from a world of last-minute headaches.
Getting Your Version and Build Numbers Straight
One of the first things you’ll finalize in Xcode is your app’s versioning. In your project settings, you’ll spot two important fields: Version and Build. They sound similar, but they play very different roles.
- Version (Marketing Version): This is the number everyone sees on the App Store—think
1.0,1.1, or2.0.1. It’s your way of telling users about major updates or new features. - Build (Build Number): This is purely for internal tracking. For any given version number, every new build you upload to App Store Connect must have a higher build number. So, if you upload Version
1.0with Build1, a quick bug fix for that same version would need to be Build2.
For your very first submission, a simple
1.0for the Version and1for the Build is standard practice. It keeps your app’s history clean and easy to follow right from the start.
The Make-or-Break Step: Code Signing
For many new developers, code signing is the most daunting part of this whole process. Don’t worry, it’s not as scary as it sounds. Essentially, it’s just Apple’s security system for verifying that the app came from you and hasn’t been messed with. This is where those certificates and provisioning profiles we set up earlier finally come into play.
Thankfully, Xcode has made this much easier over the years with its “Automatically manage signing” feature. Just tick that box, and Xcode does its best to handle all the necessary credentials for you. For most people, this is the way to go. You can find this option under the “Signing & Capabilities” tab of your project target. If you want a deeper dive, our guide on the Apple developer certificate breaks it all down.
Of course, sometimes things go wrong. If you hit a signing error, it’s almost always a mismatch between your certificate, your App ID, and the provisioning profile. Double-check that you’ve selected a “Distribution” profile specifically created for the App Store.
Archiving: Packaging Your App for Release
Once your app is building perfectly and all the settings are locked in, you’re ready to create the official release build. You don’t just hit the “Run” button for this. Instead, you need to archive it.
Here’s how you do it in Xcode:
- First, change your run destination at the top of the Xcode window to Any iOS Device (arm64) or a similar generic target. Don’t use a simulator or your own iPhone.
- Then, head up to the menu bar and choose Product > Archive.
- Xcode will now compile everything. If it succeeds, the Organizer window will pop up, showing your brand-new archive.
Think of this archive as the final, shrink-wrapped version of your app, signed and ready to be shipped off to Apple.
Uploading to App Store Connect
With the archive sitting pretty in the Organizer, you’re on the home stretch. You have two main ways to get it to Apple.
The most common method is to do it right from Xcode. Select your archive in the Organizer and click the “Distribute App” button. A wizard will guide you through the next steps—just choose “App Store Connect” as the destination, and Xcode will handle the validation and upload.
Alternatively, you can use Apple’s Transporter app. This is a separate tool for macOS that’s perfect if you’re uploading a build file (.ipa) from someone else or if Xcode’s uploader is giving you trouble. In the Organizer, you can export your archive as an .ipa file, then simply drag that file into Transporter.
Once the upload is finished (it can take anywhere from a few minutes to an hour), your build will show up in App Store Connect under the “TestFlight” tab. From there, you can finally attach it to your app’s product page and submit it for review.
Navigating The App Store Review Guidelines
You’ve hit ‘Submit for Review’. It’s a huge moment, but don’t pop the champagne just yet. Your app is now in the hands of Apple’s review team, the final gatekeepers ensuring every app meets their high standards for safety, performance, and user experience.
This isn’t some black box where apps go to meet their fate. Apple’s process is surprisingly transparent if you know where to look. They aren’t trying to make your life difficult; they’re fiercely protective of their users and the quality of their ecosystem. Your key to a smooth submission is understanding their rulebook: the official App Review Guidelines. Treat this document like gold.
Here’s a glimpse of the guidelines page itself. It’s laid out pretty clearly, which is a huge help.
Getting to know these five main pillars is the single best thing you can do to sidestep a rejection notice.
Decoding Common Rejection Reasons
While the guidelines are comprehensive, a few specific issues trip developers up constantly. Apple themselves have said that Guideline 2.1: App Completeness is one of the biggest reasons for rejection. This is a broad category covering everything from bugs and crashes to broken links and placeholder content. The app you submit needs to feel finished. No “coming soon” pages.
Another major one is Guideline 5.1.1: Data Collection and Storage. Apple takes user privacy very seriously. You have to be completely upfront about what data you’re collecting and exactly why you need it. If your app asks for location access but has no feature that actually uses that data, you’re practically asking for a rejection.
Here are a few other all-too-common pitfalls:
- Misleading Metadata: Your app’s description, screenshots, and videos must be an honest reflection of what the app actually does. Don’t market a feature that’s half-baked or non-existent.
- Poorly Moderated Content: If your app features content from users, you are responsible for it. You need a solid system for filtering out objectionable material and a clear way for users to report it.
- Broken Login: This one is painfully common and so easy to avoid. If your app has a login, you must provide Apple with a working demo account. Forgetting this simple step will get you an instant rejection.
To dig deeper into these potential landmines, check out our detailed guide on the https://codepushgo.com/blog/app-store-review-guidelines/ before you submit. It could save you a lot of time and frustration.
Having a checklist of the most frequent rejection reasons can be a lifesaver. I’ve seen too many developers get tripped up by the same preventable issues. Here’s a quick-reference table to help you spot and fix these problems before you submit.
Common App Store Rejection Reasons and How to Avoid Them
| Rejection Reason | Why It Happens | Prevention Strategy |
|---|---|---|
| Guideline 2.1 - Crashes and Bugs | The app is unstable, crashes on launch, or has significant bugs that hinder usability. | Test relentlessly on multiple devices and iOS versions. Use tools like TestFlight with a diverse group of beta testers to catch bugs before submission. |
| Guideline 5.1.1 - Privacy | Missing or unclear privacy policy, or collecting user data without explicit consent or a clear purpose. | Draft a comprehensive privacy policy and link to it in-app and in App Store Connect. Only request permissions when a feature requires them and explain why in the purpose string. |
| Guideline 2.3 - Inaccurate Metadata | Screenshots, app description, or keywords are misleading and don’t accurately represent the app’s functionality. | Ensure all marketing materials are current and honest. Your screenshots should show the actual app in use, not just mockups. |
| Guideline 4.2 - Minimum Functionality | The app is too simple, web-based (a “web wrapper”), or doesn’t offer enough lasting value to users. | Make sure your app provides a rich, native experience. If it’s a simple concept, focus on exceptional design and user experience to add value. |
| Guideline 3.1.1 - In-App Purchase | The app sells digital goods or services without using Apple’s IAP system, or tries to link out to other payment methods. | If you sell digital content, you must use Apple’s In-App Purchase API. Read the guidelines carefully to understand what requires IAP and what doesn’t. |
Reviewing this table and cross-referencing it with your app is a final sanity check that can make the difference between a smooth approval and a frustrating rejection loop.
How To Talk To The Review Team
Don’t think of the review team as an obstacle; they’re part of the process. The clearer the information you give them, the faster and smoother your review will be. You do this in the “App Review Information” section in App Store Connect.
My Go-To Tip: If your app has a tricky workflow, a feature that requires special hardware, or anything else that isn’t immediately obvious, record a quick demo video. Host it on a private link and include it in your review notes. Showing a reviewer how something works is a million times better than trying to explain it with text.
Be thorough in your notes. Detail what’s new in the build, provide test credentials that actually work, and spell out any special setup required to see every feature. Make their job easy, and they’ll get you through the queue much faster.
So, You Got Rejected. Now What?
First, take a breath. It’s not the end of the world. A rejection is just a request for more information or some changes. It happens to everyone, from indie devs to the giants like Facebook and Google.
Apple will give you a specific reason for the rejection, pointing to the exact guideline you violated. Your job is to read their feedback, swallow your pride, and understand the real issue. Don’t fire back with a defensive argument.
Focus on fixing the problem they flagged. Once you’ve addressed it, you can resubmit a new build. In my experience, these follow-up reviews are often quicker because the reviewer is just looking to confirm you’ve made the specific fix they asked for. It’s all part of the game.
So, your app is officially live on the App Store. Huge congrats! It’s easy to feel like you’ve crossed the finish line, but really, you’ve just started a whole new race. The real work of building a successful, lasting app begins now.
What you do from this point forward is what separates an app that disappears in a few weeks from one that builds a real audience. The launch isn’t the end; it’s the start of a cycle of monitoring, updating, and actually talking to your users.
Keeping a Pulse on Performance with App Store Connect
Your first stop should be App Store Connect Analytics. This is your command center, giving you a real-world look at how people are interacting with your app. Don’t just get hung up on the download count; the real story is in the details.
- Impressions & Product Page Views: This tells you how many people see your app in search and how many are curious enough to click. If you’re getting tons of impressions but few page views, it might be time to rethink that app icon or subtitle.
- Downloads & Sales: The metric everyone loves to watch. Dig deeper, though. Segment this data by country or source to figure out where your best users are coming from.
- Usage Data (Sessions & Active Devices): This is the “stickiness” factor. A ton of downloads but very few active devices is a major red flag. It means people are trying your app and leaving, so you need to figure out why.
- Crash Reports: Every app crashes. It’s unavoidable. What is negotiable is how you respond. Keep a close eye on your crash rate to find and squash the bugs that are ruining the user experience.
Checking these numbers isn’t just about data collection. It’s about being a detective. Why did downloads suddenly jump last week? Are German users bouncing after the first screen? The answers to these questions become your roadmap for what to build and fix next.
Why You Can’t “Set It and Forget It”
An app that never gets updated is an app that’s slowly being abandoned. Users have come to expect constant improvements, and the iOS ecosystem itself is always moving forward. A steady rhythm of updates is crucial for squashing bugs, rolling out new features, and just staying compatible with the latest version of iOS.
This isn’t just about maintenance; it’s a huge part of keeping users around. Consider this: about 34% of apps on the App Store push an update every single week, and more than 96% are updated at least once a year. That tells you how critical this is. To dive deeper into this, creating a mobile app update strategy is a great next step. It sends a clear message to your users: “We’re still here, and we’re committed to making this better.”
Your Reviews Are a Goldmine of Feedback
The reviews section on your App Store page is a direct-line to your users. It’s raw, unfiltered, and incredibly valuable. Engaging with people here—both the happy and the frustrated—is one of the best ways to build a community.
When you’re wading into the reviews, keep these tips in mind:
- Tackle the negative ones head-on. Acknowledge the person’s issue right away. Even if you can’t fix it instantly, letting them know you’ve heard them and a fix is planned for the next update can turn a frustrated user into a fan. It also shows potential downloaders that you’re responsive.
- Don’t ignore the positive reviews! A quick “Thanks so much, glad you’re enjoying it!” goes a surprisingly long way. It validates their good experience and keeps them on your side.
- Look for patterns. One person complaining about a bug might be a fluke. Ten people complaining about the same bug is a priority. Use your reviews to spot trends and let them guide what you work on next.
Frequently Asked Questions

Going through the App Store submission process for the first time always brings up a few questions. I’ve been there. To help you out, here are some straightforward answers to the things developers most commonly ask.
How Long Does The App Store Review Process Usually Take?
You can generally expect the review to take somewhere between 24 and 48 hours. But honestly, that’s just an average.
Your very first submission might take a bit longer as Apple’s team takes a closer look. I’ve also seen review times stretch out during busy seasons, like right after a new iOS launch or around the holidays when everyone is rushing to push updates. On the flip side, minor bug-fix updates often sail through much faster than a brand-new, feature-heavy app.
Can I Publish An App For Free Without A Developer Account?
Simply put, no. To publish any app on the App Store, free or paid, you absolutely have to be enrolled in the Apple Developer Program. There’s no way around this.
The membership runs $99 per year, and it’s the key that unlocks everything you need: beta OS versions, critical development tools, and, most importantly, the ability to get your app in front of a global audience.
What Is The Most Common Reason For An App Rejection?
A huge number of rejections get pinned on Guideline 2.1, which is all about App Completeness. This is a catch-all for apps that just aren’t ready for prime time. Think major bugs, broken links, placeholder text (“lorem ipsum,” anyone?), or missing metadata.
Apple’s reviewers want to see a finished, polished product. My best advice? Always, always test your app on a real device before you even think about submitting. The simulator can hide performance glitches and bugs that only show up on actual hardware.
Do I Need A Mac To Publish An iOS App?
Yes, when it comes down to the final steps, a Mac is non-negotiable. The main reason is Xcode, Apple’s integrated development environment. It’s the only official tool for compiling your final build, handling the code signing, and uploading everything to App Store Connect.
While you can write a lot of your code on a PC using cross-platform tools, you will eventually hit a wall. You’ll need access to a Mac for that last, critical mile of the submission process.
Getting your app published is a huge win, but the real work is keeping it great. For those small code changes and urgent bug fixes, waiting for another App Store review can be painful.
This is where a tool like CodePushGo comes in handy. It lets you push code-level updates directly to your users’ devices, skipping the review queue entirely. You can fix issues in minutes, not days, which helps keep your ratings high and your users happy.
Ready to take back control of your release cycle? See how CodePushGo can help you ship updates faster.


