The mobile app development lifecycle is the road map that takes an app from a simple idea scribbled on a napkin to a polished product in the hands of users—and keeps it running smoothly long after launch. It’s a structured process, a step-by-step guide that ensures nothing gets missed along the way.
Your Blueprint for Building a Successful App
Trying to build an app without a clear lifecycle is a bit like trying to build a house without a blueprint. You might get a few walls up, but you’ll quickly run into chaos. A structured approach turns that chaos into a well-managed project, breaking the massive undertaking into smaller, more manageable phases. Each stage logically flows into the next, creating a clear path from concept to completion.
And the stakes couldn’t be higher. The global mobile app market was valued at around $475.9 billion in 2022 and is expected to soar to $756 billion by 2027. You can dig into more data on mobile app industry growth to see just how massive this market is. This incredible growth isn’t happening by accident; it’s fueled by well-built apps that followed a disciplined process.
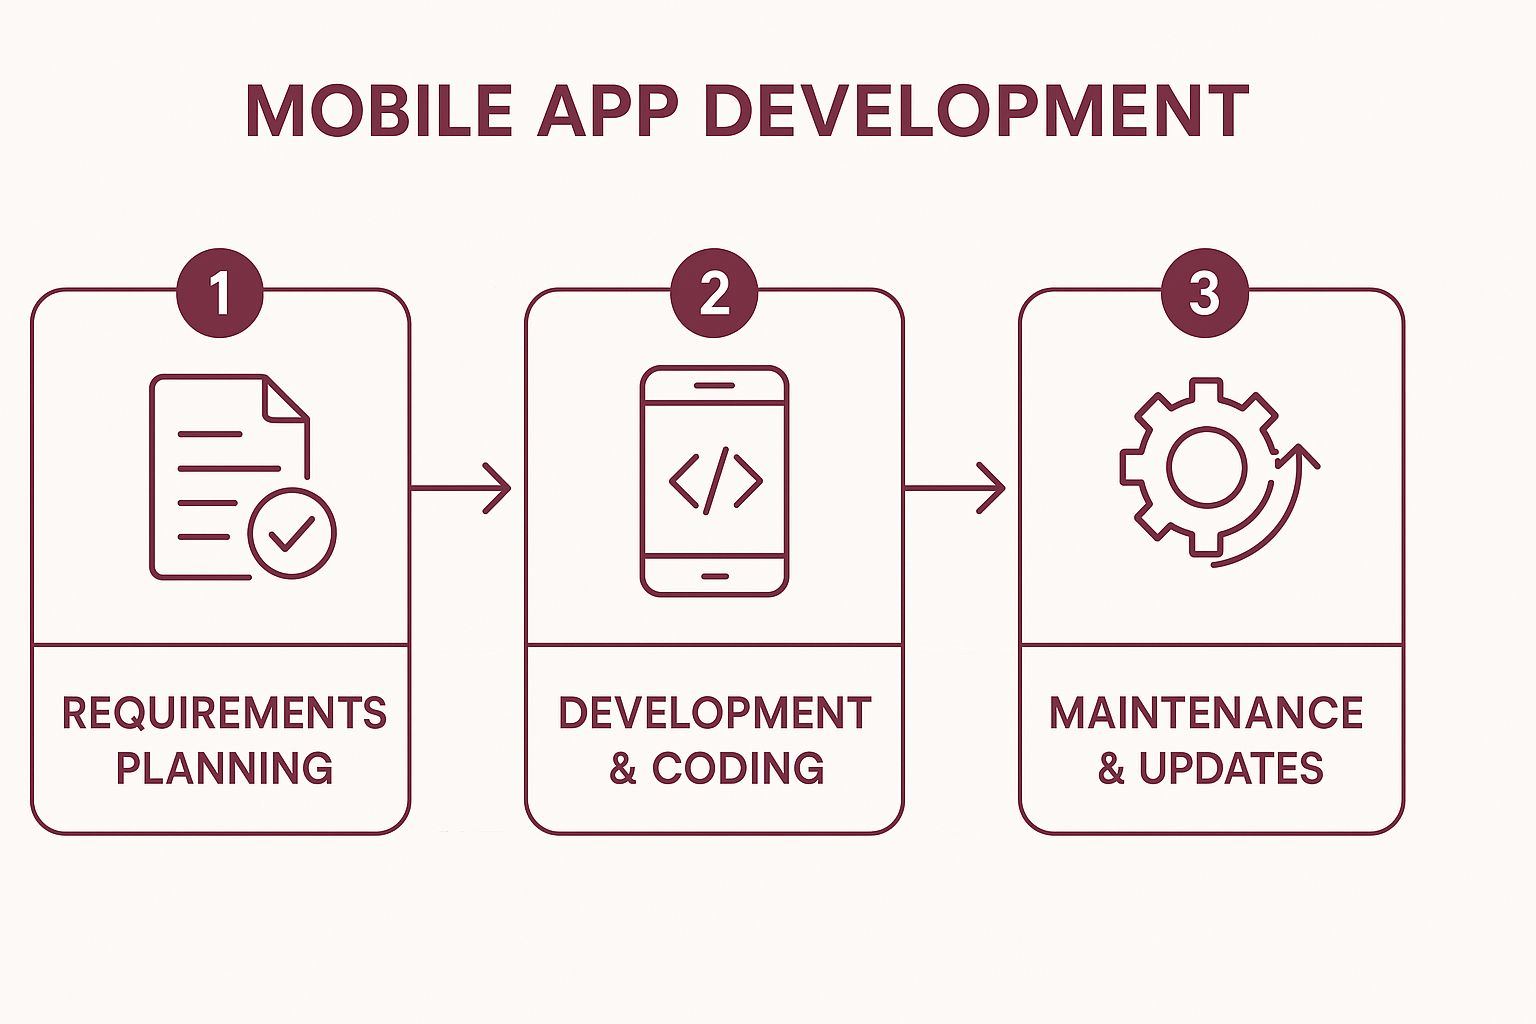
To give you a bird’s-eye view, here’s a quick breakdown of the core stages.
| Lifecycle Stage | Primary Goal |
|---|---|
| 1. Planning & Discovery | Validate the app idea, research the market, and define its core purpose. |
| 2. Design (UI/UX) | Create wireframes and prototypes for an intuitive, visually engaging user experience. |
| 3. Development | Write the code for the front-end, back-end, and APIs to make the app functional. |
| 4. Testing (QA) | Find and fix bugs through rigorous quality assurance to ensure stability and security. |
| 5. Deployment | Launch the app and submit it to the Apple App Store and Google Play Store. |
| 6. Maintenance | Monitor performance, gather user feedback, and roll out updates and new features. |
This table maps out the journey, but remember that modern development isn’t always a straight line.
The Cyclical Nature of App Development
This lifecycle isn’t a rigid, one-size-fits-all formula. It’s more of a flexible framework. Modern methodologies like Agile development have made the process far more dynamic, allowing for continuous iteration and improvement.
Think of it this way: the old way was like building a car on an assembly line—one step after another, with no going back. The new way is more like a pit crew in a race, constantly tweaking, adjusting, and improving the car between laps based on real-time feedback.
This infographic does a great job of visualizing how these stages connect and often overlap, forming a continuous loop rather than a linear path.
As you can see, the journey doesn’t end at deployment. The maintenance phase feeds directly back into planning and development for the next update, ensuring the app evolves with its users’ needs.
1. Laying the Foundation: Discovery and Strategy
Every great app starts with a question, not a line of code. This first phase, discovery and strategy, is where a raw idea gets pressure-tested against the realities of the market. It’s the crucial shift from “this is a cool concept” to “this is a real business that solves a genuine problem.”

Think of it like drawing up the blueprints for a skyscraper. You wouldn’t just start digging without knowing the soil conditions, the purpose of the building, or the city’s zoning laws. In the same way, you shouldn’t start coding without a deep-seated understanding of your market, your future users, and what makes your app special.
This upfront work is so important that most teams dedicate around 10-15% of the total project time just to research and planning. It’s a smart investment that prevents hugely expensive missteps down the road.
Who Is This For? Defining Your Audience and Value
Before you can build an app that people genuinely love, you have to know exactly who those people are. This means going beyond a fuzzy idea of your “user” and creating detailed user personas. These are semi-fictional profiles of your ideal customers, fleshed out with their goals, daily frustrations, and motivations.
For a new fitness app, for instance, you might create personas like:
- “Busy Brian”: A 35-year-old professional who needs quick, high-intensity workouts he can do at home before the kids wake up.
- “Marathon Maria”: A 28-year-old competitive runner who obsesses over performance data and needs advanced tracking features.
Understanding Brian and Maria is the key to nailing your Unique Value Proposition (UVP). What can your app do for them that no one else can? Is it simpler? More personalized? Cheaper? Your UVP needs to be a crystal-clear statement that answers their unspoken question: “Why should I download this app over all the others?”
A strong value proposition isn’t just a marketing slogan; it’s the core promise you make to your users. It’s the reason they’ll choose you.
Sizing Up the Competition
Once you know your audience and your promise to them, it’s time to scope out the neighborhood. A good competitive analysis isn’t about stealing ideas; it’s about learning from what others have already done—both right and wrong.
Pick out 2-3 direct competitors and a few indirect ones. Then, get to work analyzing their apps, paying close attention to:
- Features: What do they offer? More importantly, what’s missing?
- User Reviews: App store reviews are a goldmine. What do people rave about? What do they complain about constantly?
- Business Model: How do they make money? Ads, subscriptions, one-time purchases?
- Positioning: What’s their brand’s vibe? Who are they trying to appeal to?
This research helps you find the gaps in the market, refine your own strategy, and ensure your app has a clear reason to exist. Digging into essential user research methods is a fantastic way to gather the insights needed to build a solid foundation.
By combining detailed personas with a sharp competitive analysis, you create a data-backed plan that will guide the rest of the development lifecycle. This is one of many mobile app development best practices that turns a simple idea into a project poised for success.
Designing an Experience Users Will Love
With your strategy locked in, the mobile app development lifecycle shifts from abstract ideas to something you can actually see and touch. This is the design phase, where your app’s personality truly comes to life. It’s all about defining how it looks, feels, and guides users from one screen to the next.
If the strategy phase was about drawing up the architectural blueprints, this is where the interior designers come in. Their job is to create an experience that’s not just functional, but genuinely enjoyable.

This stage really boils down to two critical, intertwined parts: User Experience (UX) and User Interface (UI). People often lump them together, but they play very different roles.
UX is the invisible magic—the logical flow, the intuitive navigation, and the overall gut feeling someone gets when using your app. UI, on the other hand, is what you see—the colors, the fonts, the icons, and all the visual elements that give the app its look.
You absolutely need both to succeed. Great UX with a terrible UI feels clunky and dated. A beautiful UI with confusing UX just leads to frustrated users who will quickly abandon your app. The real goal is to create a seamless journey where people can get things done without ever having to think about how to do them.
From Simple Sketches to Interactive Prototypes
The design process rarely starts with picture-perfect screens. Instead, it begins with simple, low-fidelity sketches called wireframes. Think of these as the bare-bones skeleton of your app. They show the basic layout of each screen—where buttons go, where text will live, where images will be placed—without any color or styling.
The whole point is to map out functionality and user flow first. This approach forces the team to focus on structure and usability without getting hung up on visual details. It’s a fast, inexpensive way to test different layouts and make sure the app’s core navigation is solid from the get-go.
Once the wireframes get the green light, the team moves on to high-fidelity prototypes. These are detailed, interactive mockups that look and behave almost exactly like the finished product. Using tools like Figma or Adobe XD, designers bring the wireframes to life with colors, typography, and branding.
Crucially, these prototypes are clickable. You can tap on buttons, move between screens, and simulate the complete user journey. This step is a game-changer for a couple of reasons:
- Stakeholder Alignment: It gives everyone involved—from developers to marketing—a clear, tangible preview of the final app.
- Early Usability Testing: You can put the prototype in front of real users and gather invaluable feedback before a single line of code is written.
Catching a design flaw during the prototype stage is 10 times cheaper to fix than during development, and a staggering 100 times cheaper than fixing it after the app is launched.
The Power of User-Centric Design
At the end of the day, the success of this entire phase depends on a user-centric mindset. Every single design choice, from the size of a button to the phrasing in a menu, has to be made with your end-user in mind. This is where those user personas you built during the strategy phase become absolutely essential, guiding your designers to craft an experience that resonates with your specific audience.
For teams building with frameworks like React Native, this process can be sped up by using a pre-built https://codepushgo.com/blog/category/react-native-ui-library/. These libraries provide a whole suite of ready-made, customizable components that already follow design best practices, helping you maintain a high-quality and consistent interface.
By blending a strong, custom design with these reliable building blocks, you create an app that’s not just beautiful but also intuitive—an app that people will actually want to come back to.
Bringing Your App to Life with Agile Development
https://www.youtube.com/embed/xT8oP0wy-A0
Alright, you’ve got a solid plan and a killer design. Now comes the heavy lifting—the part where all those ideas and blueprints get turned into a real, working app. This is where the code gets written and static screens become interactive experiences.
Think of it like building a high-tech car. The development process involves bringing together three distinct but interconnected parts.
- The Front-End: This is everything your user sees and touches. It’s the car’s interior—the steering wheel, the sleek dashboard, the comfortable seats. In your app, it’s the buttons, menus, and smooth animations that make it a joy to use.
- The Back-End: This is the engine under the hood. It’s the server, the database, and all the complex logic that you don’t see but absolutely rely on. It processes data, manages user accounts, and makes sure everything runs smoothly behind the scenes.
- The API (Application Programming Interface): The API is the nervous system connecting the front-end to the back-end. It’s the messenger that tells the engine what to do when you press the gas pedal. When a user taps a button, the API ensures the server gets the message and responds instantly.
Choosing Your Development Path
Before a single line of code is written, you have to make a huge decision about how you’re going to build the app. This choice will shape your budget, your timeline, and how your app ultimately performs. There are really three roads you can go down.
1. Native Development: This is the bespoke, tailor-made approach. You build one app for iOS (using Swift or Objective-C) and a completely separate one for Android (using Kotlin or Java). It delivers the absolute best performance and gives you full access to a device’s hardware, but it’s also the most expensive and time-consuming option.
2. Cross-Platform Development: This is the efficiency play. Using a framework like React Native or Flutter, your team writes one codebase that runs on both iOS and Android. This dramatically cuts down on development time and cost. The mobile app development lifecycle in 2025 can take anywhere from 2 to 12 months, and going cross-platform can shrink that timeline by about 30% simply by reusing code.
3. Hybrid Development: This approach essentially puts a web app inside a native “wrapper.” It’s usually the fastest and cheapest way to get an app to market, but it often comes with performance trade-offs. This makes it a good fit for simpler apps that are mostly about displaying content.
Embracing Flexibility with Agile Methodology
Gone are the days of rigid, waterfall-style projects where you build the whole thing at once and hope for the best. Today, the smartest teams work with the Agile development methodology. Instead of one long, massive push, Agile breaks the project down into small, bite-sized cycles called “sprints.”
Each sprint is a mini-project that lasts about two to four weeks and focuses on building a small set of working features. At the end of every sprint, the team has something tangible to show for their work. This is a game-changer.
By building and testing in short cycles, Agile allows teams to gather feedback early and often. This flexibility makes it far easier to adapt to changing requirements and user needs without derailing the entire project.
This iterative approach means you’re always working on what’s most important right now, which seriously reduces risk. It also keeps everyone in the loop, since stakeholders get to see real progress every few weeks. To learn more about how this works in practice, dive into our guide on implementing agile mobile app development. Adopting an Agile mindset helps your team handle the inevitable curveballs of development and create a product that people actually want to use.
4. Rigorous Testing: Ensuring a Flawless Launch
After all the hard work in planning, design, and coding, you finally have a working app. It’s tempting to think you’re at the finish line, but what comes next is arguably the most critical checkpoint in the entire mobile app development lifecycle: the testing phase.
Skipping this stage is like building a car and never taking it for a test drive. You wouldn’t ship it to customers without knowing if the brakes work, right? A single bad bug can tank your app store ratings, drive users away for good, and do serious damage to your brand’s reputation. This is where a solid Quality Assurance (QA) process acts as your final gatekeeper, making sure your app is stable, secure, and ready for prime time.

The Different Layers of App Testing
Good QA isn’t just about finding crashes. It’s a multi-layered process where each layer examines a different aspect of your app’s quality. A truly comprehensive testing plan covers several key areas.
Here’s a look at the essential testing types you’ll encounter and why each one matters.
Essential App Testing Types Compared
This table breaks down the most common types of testing. Think of it as your QA cheat sheet—each type has a distinct job to do in making sure your app is rock-solid.
| Testing Type | Primary Purpose | Example Check |
|---|---|---|
| Functional Testing | To confirm the app works as designed | Does tapping the “Add to Cart” button actually add the item to the cart? |
| Usability Testing | To evaluate how easy and intuitive the app is for real users | Can a new user figure out how to complete the signup process without instructions? |
| Performance Testing | To measure stability, speed, and resource usage | How much battery does the app drain after an hour? Does it lag on a spotty 3G connection? |
| Security Testing | To identify and fix vulnerabilities that could expose user data | Can a malicious user access another user’s private information? Is data encrypted properly? |
Each of these tests provides crucial feedback that helps you polish the app. Implementing comprehensive software testing best practices is the only way to ensure you’re covering all your bases and delivering an experience that users can trust.
Manual vs. Automated Testing: A Powerful Combination
To run all these checks, teams generally use a mix of manual and automated testing. It’s not a question of which one is better—they solve different problems and are most powerful when used together.
Manual testing is where you need a human touch. It’s perfect for usability and exploratory testing, where a person’s intuition can spot awkward workflows or confusing design choices that a script would miss. Automated testing, on the other hand, is a lifesaver for repetitive tasks. It can run hundreds of regression tests overnight to make sure a new feature didn’t accidentally break something else.
By blending the creative eye of a manual tester with the relentless speed of automation, you build a much stronger safety net. This two-pronged approach catches more bugs, saves time, and ultimately separates a frustrating, buggy app from a polished, five-star product.
For a deeper dive into building out your strategy, our guide on https://codepushgo.com/blog/how-to-test-a-mobile-app/ offers a complete roadmap.
Phase 5: The Grand Opening—Deployment and Post-Launch
You’ve made it. After all the brainstorming, designing, coding, and debugging, your app is finally ready for its big debut. This is the deployment phase—the moment your project leaves the nest and goes live for the world to see. But don’t pop the champagne just yet. Launching isn’t the finish line; it’s the starting pistol for the next, equally important race focused on growth and keeping your users happy.
Think of it like opening a new restaurant. You’ve spent months perfecting the menu, designing the interior, and training your staff. Now, it’s time to unlock the doors and let the first customers in. For an app, this means submitting it to the big leagues: the Google Play Store for Android and Apple’s App Store for iOS.
Each marketplace has its own rulebook—a strict set of technical specs, content policies, and review procedures. Getting your app ready for submission is a detailed, meticulous process. You’ll need everything from eye-catching screenshots to a sharp, keyword-rich description. A single misstep can get your app rejected, leading to frustrating delays.
Getting Through the Gates: App Store Submission
The submission process is a milestone in itself. You’ll need to set up developer accounts, build out your app’s public listing, upload the finalized code package, and then hold your breath while it’s under review. Apple is known for its thorough, human-led review process, which can take a few days. Google’s is typically faster, relying more on automated checks.
A successful launch is about more than just getting approved. It’s about making a killer first impression. Your app store listing is your digital storefront—it has to be compelling enough to turn a casual browser into an active user.
This step is loaded with small details that can make or break your app’s early momentum. For a deep dive into navigating this process, our guide on the mobile app deployment process walks you through every detail you’ll need for a smooth launch.
Launch Day is Day One: Maintenance and Growth
Once your app is live, your focus has to shift almost immediately to what comes next. This is where the development lifecycle really earns its name. The job now is all about monitoring performance, gathering user feedback, and planning your next moves.
Right away, you need to be watching your analytics like a hawk. Keep a close eye on these key metrics:
- Crash Reports: Is the app stable? Are certain devices or OS versions causing problems?
- Server Performance: Can your backend infrastructure handle the traffic, or is it buckling under pressure?
- User Engagement: Which features are people actually using? Where in the app do they get stuck or decide to leave?
This data is gold. It’s your direct connection to how people are experiencing your app in the real world, showing you what’s a hit, what’s a miss, and where you can make things better.
Staying Agile with Over-The-Air Updates
When you get that feedback, you need to act on it—fast. If a nasty bug is crashing the app for half your new users, you can’t afford to wait a week for the app stores to approve a new version. This is where Over-The-Air (OTA) updates come in and change the game.
Tools like CodePushGo give you the power to push code updates directly to your users’ devices, completely skipping the standard app store review for smaller fixes. Found a typo in your onboarding flow right after launch? Instead of going through the entire resubmission ordeal, you can push a fix in minutes. This agility gives you a serious competitive edge, letting you:
- Fix critical bugs instantly, which saves your user retention and protects your app store rating.
- Tweak features or UI elements based on immediate user reactions.
- Run A/B tests on the fly to see which headlines, buttons, or colors actually convert better.
By making OTA updates a core part of your post-launch strategy, you shift from a slow, reactive maintenance model to a nimble, proactive cycle of constant improvement. It’s how you ensure your app doesn’t just launch well but also evolves to keep users coming back for more.
Frequently Asked Questions About the Lifecycle
It’s totally normal to have questions when you’re staring down the long road of app development. Let’s tackle some of the most common ones I hear from teams, so you can sidestep a few headaches before they even start.
How Long Does the Entire Lifecycle Take?
This is the classic “how long is a piece of string?” question. The honest answer is: it depends entirely on your app’s complexity, your team’s size, and the tech stack you’re using.
But for a ballpark estimate, a simple app can often go from idea to first launch in about 2 to 4 months. If you’re building something much more ambitious—think custom features, a complex backend, and multiple third-party integrations—you should probably budget for 6 to 12 months, maybe even longer. One way to speed things up is by using cross-platform tools like React Native, which can often cut down the development time by around 30% since you’re writing code once for both iOS and Android.
What Is the Most Common Pitfall in the Process?
Without a doubt, the single biggest mistake I see is inadequate planning. Teams get so excited about an idea that they jump straight into design and coding without ever really validating it.
This almost always leads to building features nobody actually wants, endless scope creep, and a budget that spirals out of control. A poorly defined strategy is like trying to build a house on a foundation of sand. It doesn’t matter how beautiful the walls are if the whole thing is doomed from the start.
The most expensive mistake is building the wrong product perfectly. Taking the time to validate your concept with real market research and user feedback is the best investment you can make in the entire mobile app development lifecycle.
Why Is Post-Launch Maintenance So Important?
Getting your app into the store isn’t the finish line—it’s the starting gun. From that moment on, you’re in a long-term relationship with your users, and the digital world around you is always in motion.
Here’s why you can’t afford to skip ongoing support:
- OS Updates: Apple and Google roll out major operating system updates every year. If you don’t keep your app compatible, you can bet features will start to break.
- Security Vulnerabilities: New security threats pop up all the time. Regular maintenance is the only way to patch holes and keep your users’ data safe.
- User Feedback: Your users will give you the best ideas for making your app better. The maintenance phase is your chance to listen, adapt, and roll out changes that genuinely improve their experience.
Neglecting your app after launch is a surefire way to get bad reviews, lose users, and eventually become irrelevant. It’s a commitment that’s every bit as important as the initial build.
Ready to streamline your post-launch maintenance and ship updates instantly? With CodePushGo, you can push bug fixes and new features directly to your users’ devices, skipping the slow app store review process. Empower your team to respond faster and keep your users happy. Learn more and get started for free at codepushgo.com.


